Power Query: Splitting Columns
Post Tags: Power Query | Free | See all tags
This post was made with the March 2024 version of Power BI Desktop.
Today we’re exploring how to split a column in Power Query Editor. Sometimes you get stuck with two data points in one column and you need to split them out into different columns so you can visualize each, or use one of them in a slicer or a filter.
This post (and video below) uses a new blank Power BI report and connects some simple data to introduce how to split a column. To download the source Excel data file this report uses to try out what I do in this post and video, here is the data file you can connect to Power BI Desktop:
Here’s the video post. Written version is below the video.
Sometimes, we have two (or more) data points crammed together in one column in our data source. Maybe it’s a data source we don’t own and can’t clean it up before connecting it to Power BI, or you just don’t have time to clean it in your source.
We can split these 2 data points into their own columns nice and easily using Power Query Editor.
Let’s start with a blank Power BI report and click the big green “Import Data from Excel button”. We’ll navigate to where our data source is, select it, and click Open.
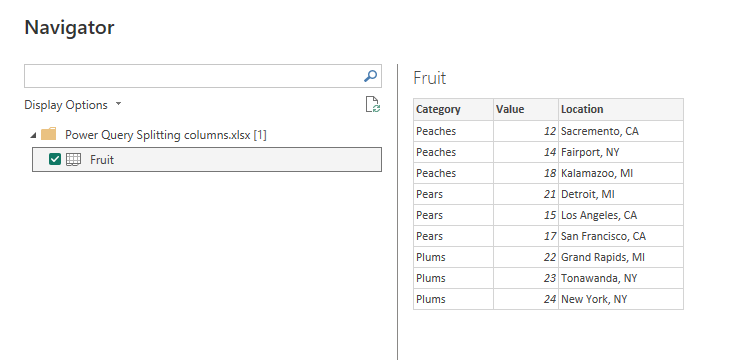
When we get our Navigator window opening up, we can see our source spreadsheet only has one tab, named “Fruit”. Check that Fruit tab and let’s have a look at the data preview it shows us.
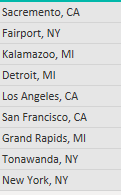
Our dataset is nice and simple for this example. We have a fruit category column, a value column, and a Location column. The location column has locations in California, Michigan, and New York.
Are peaches actually grown in Kalamazoo, Michigan? Probably not. That’s okay, this is just learning data.
We have a problem with our Location column (other than the concept of Kalamazoo Peaches) and that’s that our City data and our State data are crammed into the same column. If we wanted to build a slicer or filter for our data that was based on State, we couldn’t do it… our State data doesn’t have a place just for it in our data.
We’re going to give it one.
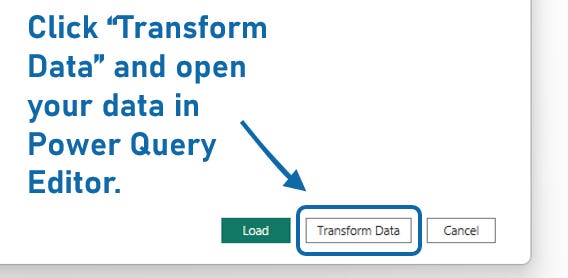
With the Fruit tab checked, let’s click “Transform Data” at the bottom of the Navigator window
Now, we can split our Location column into 2 nice and easy. We’ll get a column with City data and a column with State data.
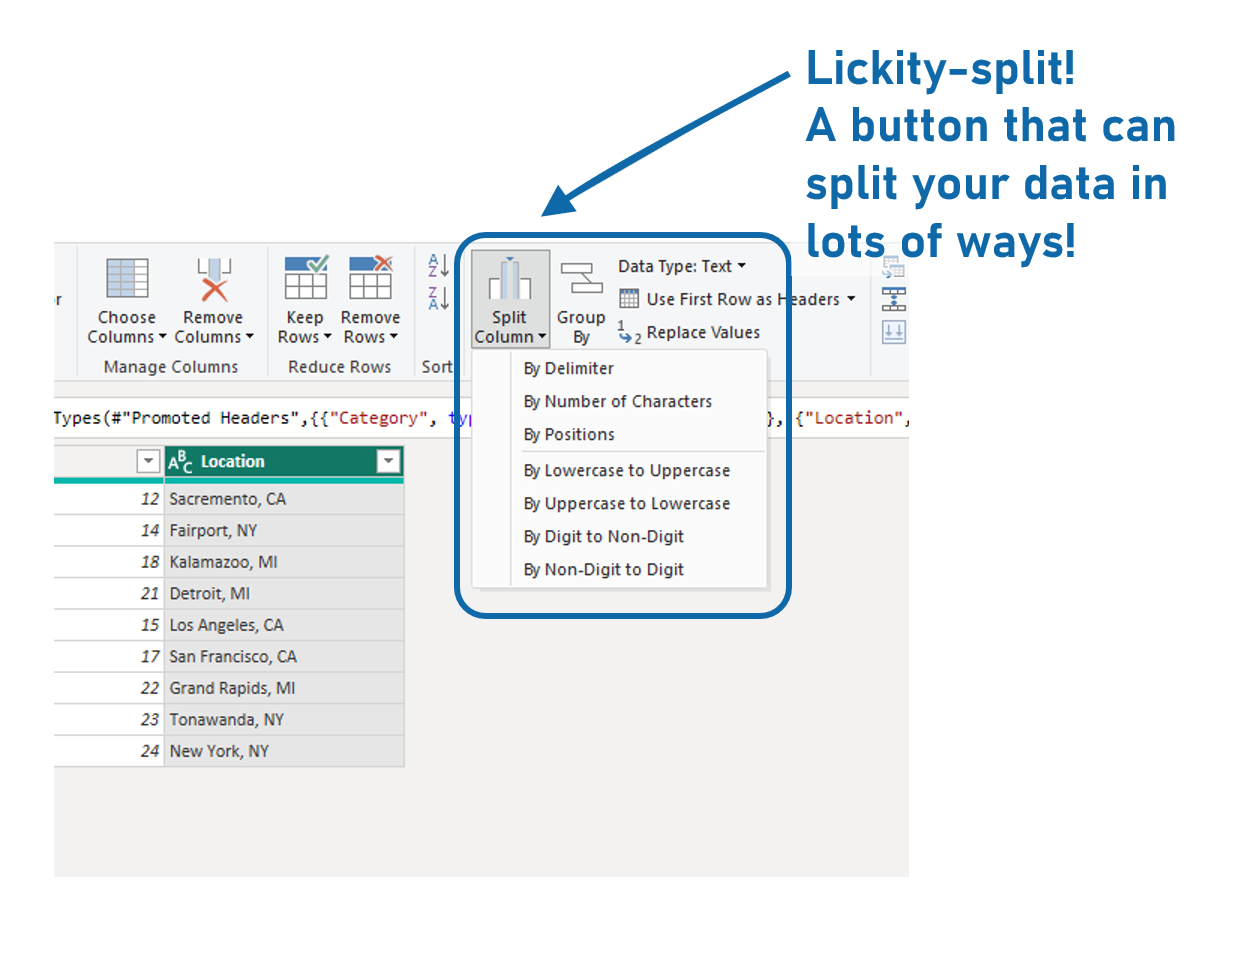
First, select your Location column header to select the whole column, then go up to your Ribbon and look for the button that’s named “Split Column”. Click it!
It gives us a lot of options for how to split our column.
Most of these options are self-explanatory. Splitting by number of characters, or separating out text and non-text data, or upper and lower case data.
We’re going to chose the first option, called “By Delimiter”, which splits data using a delimiter, otherwise known as a character that is common to all rows in our data. We have a comma right after our City names. That’s our delimiter.
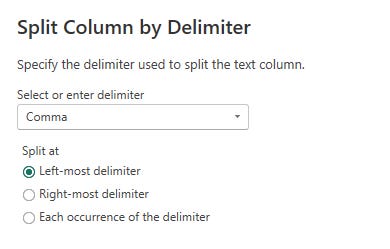
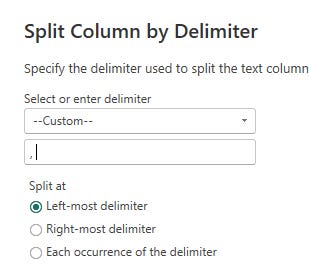
Choose “By Delimiter” and you’ll get a window where we can set up settings for our Split. We can choose what delimiter we want to use. Commas are very common as delimiters, and we’re going to select that, and we can also select “Left-most delimiter” so if our column had more than one column, you can specify that you only want the split to recognize the first delimiter.
This looks right, but we need to have another look at our data before we perform our split.
Our column actually has a comma AND a space between our City and State data, and if we only specify a comma as our delimiter, that space will get grouped with our State acronyms. We’ll get “ CA” and “ MI” and “ NY”. A space before each one
.
To avoid this, we’ll select “—Custom—” in our Delimiter selector and then punch in a comma and a space. We’ll leave the split position at “Left-most delimiter”.
Now we can click that OK button at the bottom of the Split Column window.
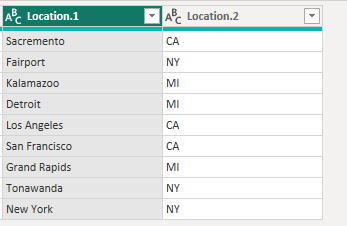
We now have TWO location columns. One with our City data and one with our State data.
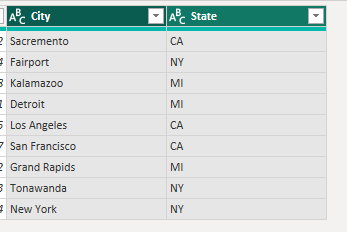
The last step here is to rename these two columns to have more descriptive names. Double-click on each header in turn and you can rename them “City” and “State”.
Now you can hit “Close and Apply” and Power BI will apply these changes and bring the data into your report with the “Location” field in your data source split into “City” and “State” in your report.
That’s it. Nice and easy.
If you have a question about Splitting Columns, leave a comment below and we’ll figure it out!
Take care,
Joe.
Post Tags: Power Query | Free | See all tags


